

What is actually VPC peering?
A virtual private cloud (VPC) is a virtual network dedicated to your AWS account. It is logically isolated from other virtual networks in the AWS Cloud. You can launch AWS resources, such as Amazon EC2 instances, into your VPC.
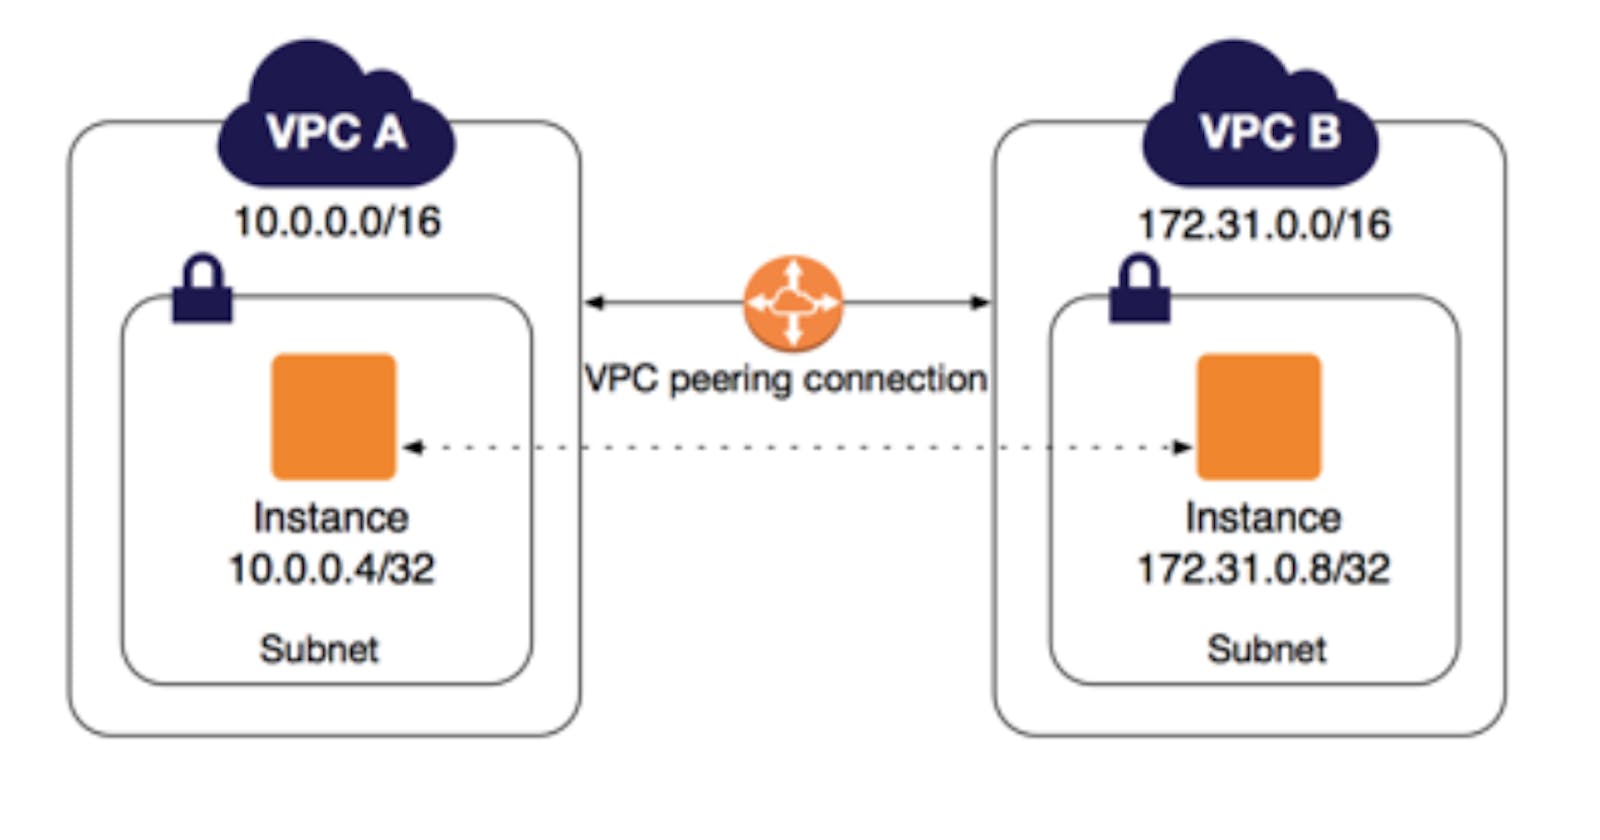
A VPC peering connection is a networking connection between two VPCs that enables you to route traffic between them using private IPv4 addresses or IPv6 addresses. Instances in either VPC can communicate as if they are within the same network. You can create a VPC peering connection between your VPCs or a VPC in another AWS account. The VPCs can be in different Regions (also known as an inter-Region VPC peering connection).
Pricing for a VPC peering connection
There is no charge to create a VPC peering connection. All data transfer over a VPC Peering connection within an Availability Zone (AZ) is free. Charges apply for data transfer over VPC Peering connections that cross Availability Zones and Regions.
LAB: How to create VPC peering?

Note: In this lab session we are going to create two different instances and try to connect the private IP of one instance by using another instance.
Step 1: Create a First VPC
Goto
Your VPCsand Create vpc1:Resources to create
VPC onlyName tag - optional eg.
vpc1IPv4 CIDR eg.
10.0.0.0/16Create VPC with all other default
Goto
Subnetsand create subnet forvpc1as:VPC ID select
vpc1Scroll down to Subnet settings
Subnet name
vpc1subnetAvailability Zone anyone your choice eg.
us-east-1aIPv4 CIDR block:
10.0.0.0/24and Create subnet
Goto
Internet gatewaysand Create internet gateway as:In Internet gateway setting
Name tag:
IGvpc1Create internet gateway
Click on the popup Attach to VPC
Available VPCs -> select a VPC :
vpc1Attach internet gateway
Goto
Route tablesand create a route table forvpc1Route table settings
Name:
route_vpc1VPC: Select
vpc1Create route table
Step 2: Similarly, Create a Second VPC
Goto
Your VPCsand Create vpc2:Resources to create
VPC onlyName tag - optional eg.
vpc2IPv4 CIDR eg.
194.0.0.0/16Create VPC with all other default
Goto
Subnetsand create subnet forvpc2as:VPC ID select
vpc2Scroll down to Subnet settings
Subnet name
vpc2subnetAvailability Zone anyone your choice eg.
us-east-1bIPv4 CIDR block:
194.0.0.0/24and Create subnet
Goto
Internet gatewaysand Create internet gateway as:In Internet gateway setting
Name tag:
IGvpc2Create internet gateway
Click on the popup Attach to VPC
Available VPCs -> Select a VPC :
vpc2Attach internet gateway
Goto
Route tablesand create a route table forvpc2Route table settings
Name:
route_vpc2VPC: Select
vpc2Create route table
Step 3: Now, Create a peering connection:
Goto
Peering connectionsby scrolling down on the left side of the barClick on Create peering connection
Peering connection settings
Name:
peerVPCVPC ID (Requester): Select
vpc1VPC ID (Accepter): Select
vpc2Create peering connection
Select
peerVPC->Actions->Accept request
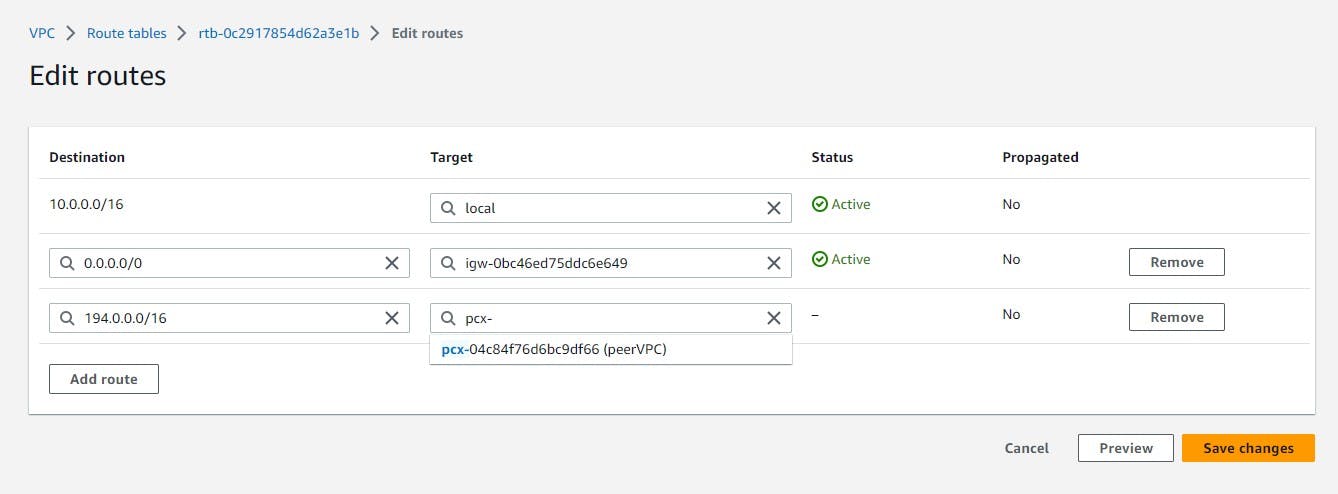
Step 4: Last thing to do Modify a route table:
Goto
Route tablesSelect
route_vpc1Click on
Subnet associations->Edit subnet associations- Available subnets: Select
vpc1subnetand Save associations
- Available subnets: Select
Click on
Routes->Edit routes->Add routeDestination:
0.0.0.0/0Targe:Internet Gateway->(IGvpc1)Destination:
194.0.0.0/16Targe:Peering Connection->(peerVPC)
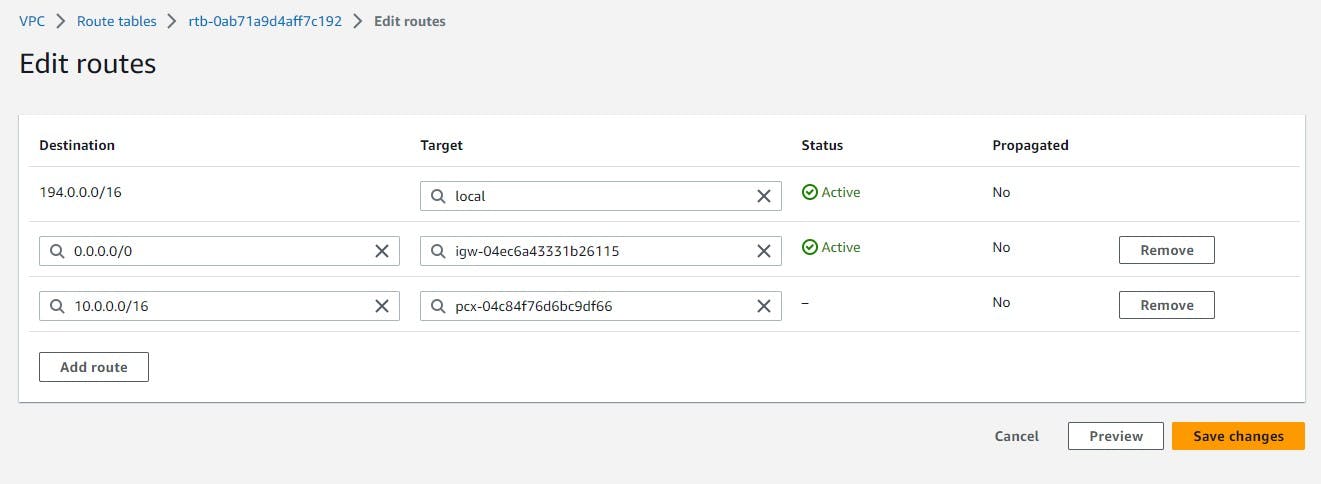
Similarly, Select
route_vpc2Click on
Subnet associations->Edit subnet associations- Available subnets: Select
vpc2subnetand Save associations
- Available subnets: Select
Click on
Routes->Edit routes->Add routeDestination:
0.0.0.0/0Targe:Internet Gateway->(IGvpc2)Destination:
10.0.0.0/16Targe:Peering Connection->(peerVPC)
Step 4: Now, Smile all VPC work was done. Next goto EC2 -> instances
For First Instance
Launch instances
Name:
server1select the existing key or create new
Network settings ->
EditVPC: Select
vpc1Subnet:
vpc1subnetAuto-assign public IP:
enableLeave Create a security group checked
Leave all default and Launch instance
For Second Instance
Launch instances
Name:
server2select the existing key or create new
Network settings ->
EditVPC: Select
vpc2Subnet:
vpc2subnetAuto-assign public IP:
desableLeave Create a security group checked
Add security group ruleType:
All trafficSource type:
Anywhere[ Note: It is not good practice to set the type
All trafficjust for basic understanding ]
Leave all default and Launch instance
Step 4: Connect the EC2 instance
After the Status check
2/2 checks passedSelect the EC2 instance with private IP i.e.
server2and copy private IPThen, Select the EC2 instance with public IP i.e.
server1And Click on
Connectat the top, again Connect
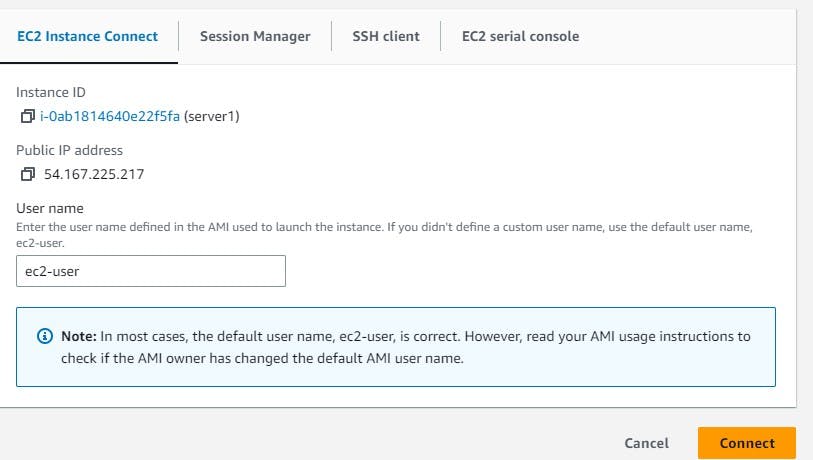
- Now, you reached this window:
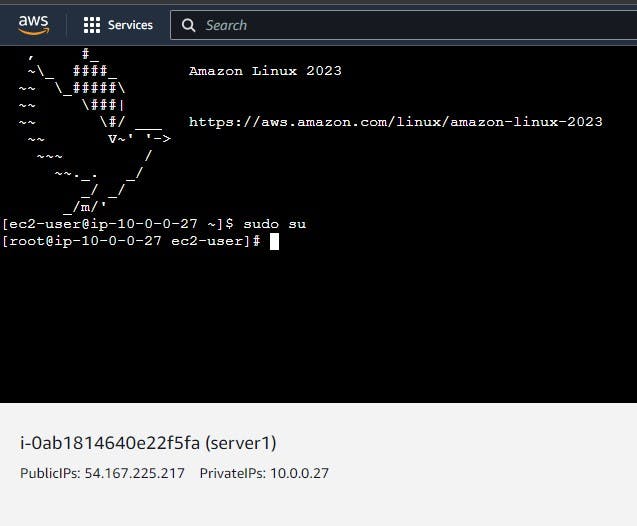
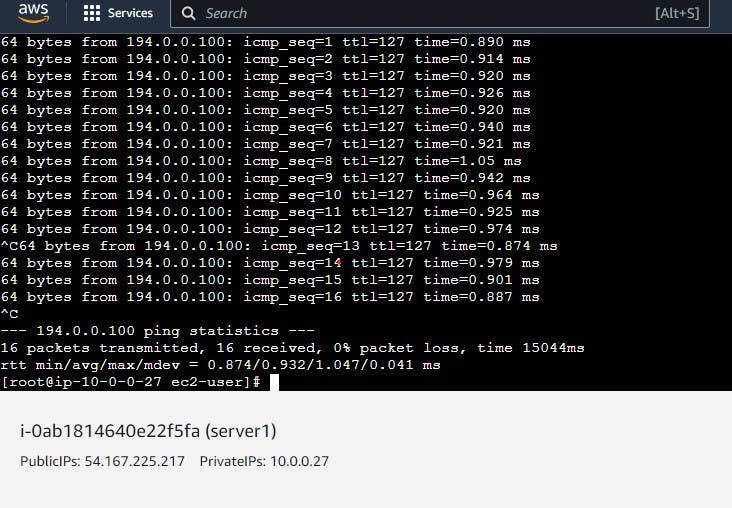
Here, perform the following commands:
sudo suping <private-ip-you-copied>- You get the following output
CTRL+C to exit
- You get the following output